 EN
EN Български
 Čeština
 Dansk
Dansk Deutsch
 Ελληνικά
 Español
 Eesti
Eesti Suomi
Suomi Français
 Gaeilge
 Hrvatski
 Magyar
 Italiano
 Lietuvių
 Latviešu
 Malti
Malti Norsk bokmål
 Nederlands
 Polski
 Português
 Română
 Slovenčina
 Slovenščina
 Srpski
 Svenska
 Türkçe
 Українська
Install
Install the Shieldix plugin
5 steps, a few minutes: install the plugin, turn on the recommended measures and connect the site to Shieldix Cloud.
Requirements
- WordPress 6.6 or later
- PHP 7.4 or later
- A single WordPress site: Multisite networks are not supported.
Steps
-
Upload the plugin zip from My account
Download the zip from My account. In WordPress, go to Plugins → Add Plugin → Upload Plugin, choose the file and click Install Now.
-
Activate it
Click Activate Plugin. The firewall starts right away, in learning mode. For the first 7 days the firewall only records what it would block, so you can review it before blocking starts.
-
Turn on the recommended measures
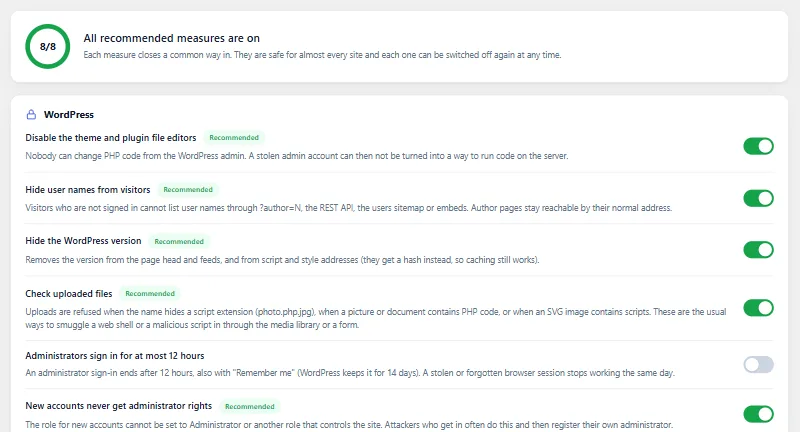
Open Shieldix → Hardening in the WordPress admin and click Turn on all recommended. Each measure says what it changes, and you can turn it off again.
-
Enable extended protection
On the Overview tab, click Enable extended protection, so the firewall checks requests before WordPress loads. On some servers it takes a few minutes to start.
-
Connect the site
In the Shieldix Cloud panel, open Sites and create a link code (
XXXX-XXXX-XXXX). The code works once, within 1 hour. In WordPress, open Shieldix → Settings, read what is sent, tick “I agree that this site sends the data above to Shieldix Cloud”, enter the code and click Connect. To connect from WP-CLI, see Connect a site to Shieldix Cloud.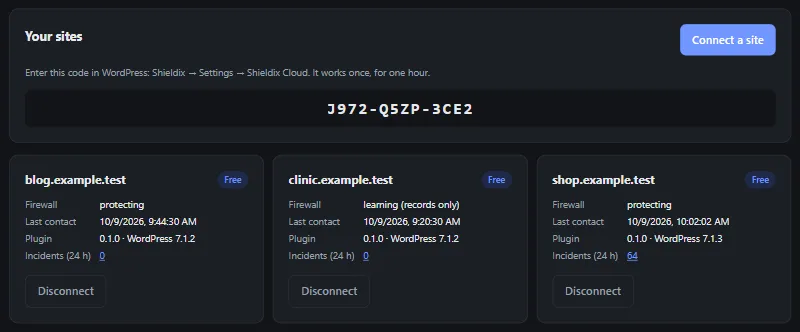
The link code in the picture has expired.
Learning mode, the never-block list, WP-CLI and more: see the Docs.
Protect your WordPress today
Choose a plan for your site and connect it in minutes.